最近Terraformをまったく触っておらず、このブログ(ConoHa VPS)をAWSなどのクラウドにリプレイスしてTerraformで管理できたら良いな〜と日々感じていましたが、なんとConoHa VPSでも可能!とのことなので、今回簡単にインスタンス作成してSSHできるか試してみました。
■流れ
やりたいことは以下になります。(tfstateファイルは今回ローカルにしか管理してません)
- terraform-server01を構築
- ssh-keyの追加
- セキュリティーグループはssh,web
- イメージはUbuntu18.04
- 1GBプラン
■準備
https://support.conoha.jp/v/addapiuser/?btn_id=controlpanel-controlpanel-api_v-addapiuser
まずは上記のようにAPIユーザを発行して、以下3つをメモります。
- APIユーザ名
- APIユーザパスワード
- テナント名
■Get API Token
まずはAPI Tokenを確認して、ConoHa VPSの情報などを取得してみましょう。
以下の id の部分をメモリます。
|
1 2 3 4 5 6 7 8 9 10 11 12 13 |
$ curl -i -X POST -H "Accept: application/json" \ -d '{ "auth": { "passwordCredentials": { "username": "xxxxxxxx", "password": "xxxxxxx" }, "tenantId": "xxxxxxxxxxxxxxx" } }' \ https://identity.tyo1.conoha.io/v2.0/tokens HTTP/1.1 200 OK Server: openresty/1.7.10.1 Date: Thu, 11 Jul 2019 01:53:01 GMT Content-Type: application/json Content-Length: 2397 Connection: keep-alive {"access":{"token":{"issued_at":"2019-07-11T01:43:07.xxxxx","expires":"2019-07-12T01:43:07Z","id":"exxxxxxxxxxxxxxxxxx→メモる","tenant":{"domain_id":"gnc","description":"","enabled":true,"id":"exxxxxxxxxxxxxxxx","name":"xxxxxxxxxxxxx"},"audit_ids":["Nz_vm1xxxxxxxxxxxx"]},"serviceCatalog":[{"endpoints":[{"region":"tyo1","publicURL":"https://account.tyo1.conoha.io/v1/xxxxxxxxxxxxxxxxxx"}],"endpoints_links": ~省略~ |
- Image(OS)の確認
|
1 2 3 4 5 6 7 8 9 10 11 12 13 14 15 16 17 18 19 20 21 22 23 24 25 26 27 28 29 |
$ curl -X GET \ -H 'Content-Type: application/json' \ -H "Accept: application/json" \ -H "X-Auth-Token: <api token>" \ https://compute.tyo1.conoha.io/v2/<tenantId>/images \ | jq ".images | sort_by(.name) | map(.name)" % Total % Received % Xferd Average Speed Time Time Time Current Dload Upload Total Spent Left Speed 100 70733 0 70733 0 0 100k 0 --:--:-- --:--:-- --:--:-- 100k "vmi-7dtd-a17.4-ubuntu-18.04-amd64", "vmi-archivebox-0.2.4-ubuntu-18.04-amd64", "vmi-archivebox-0.2.4-ubuntu-18.04-amd64-20gb", "vmi-assettocorsa-1.16-ubuntu-18.04-amd64", "vmi-docker-18.09-ubuntu-18.04-amd64", "vmi-docker-18.09-ubuntu-18.04-amd64-20gb", "vmi-dokku-0.14.5-ubuntu-18.04-amd64", "vmi-dokku-0.14.5-ubuntu-18.04-amd64-20gb", "vmi-factorio-0.16.51-ubuntu-18.04-amd64", "vmi-isucon7-qualify-ubuntu-16.04-amd64", "vmi-isucon7-qualify-ubuntu-16.04-amd64-20gb", "vmi-mastodon-2.9.2-ubuntu-18.04-amd64", "vmi-mastodon-2.9.2-ubuntu-18.04-amd64-20gb", "vmi-ubuntu-16.04-amd64", "vmi-ubuntu-16.04-amd64-20gb", "vmi-ubuntu-16.04-i386", "vmi-ubuntu-16.04-i386-20gb", "vmi-ubuntu-18.04-amd64", "vmi-ubuntu-18.04-amd64-20gb", |
するとディストリビューションが一覧で出てくるので、今回は vmi-ubuntu-18.04-amd64 を使います。
- VPSのプランを確認
https://www.conoha.jp/vps/pricing/
|
1 2 3 4 5 6 7 8 9 10 11 12 13 14 15 16 17 18 19 20 |
$ curl -X GET \ -H 'Content-Type: application/json' \ -H "Accept: application/json" \ -H "X-Auth-Token: <apitoken>" \ https://compute.tyo1.conoha.io/v2/<tenantId>/flavors \ | jq ".flavors | sort_by(.name) | map(.name)" % Total % Received % Xferd Average Speed Time Time Time Current Dload Upload Total Spent Left Speed 100 2770 100 2770 0 0 12156 0 --:--:-- --:--:-- --:--:-- 12202 [ "g-16gb", "g-1gb", "g-2gb", "g-32gb", "g-4gb", "g-512mb", "g-64gb", "g-8gb" ] |
g-1gb でOK
■Terraform
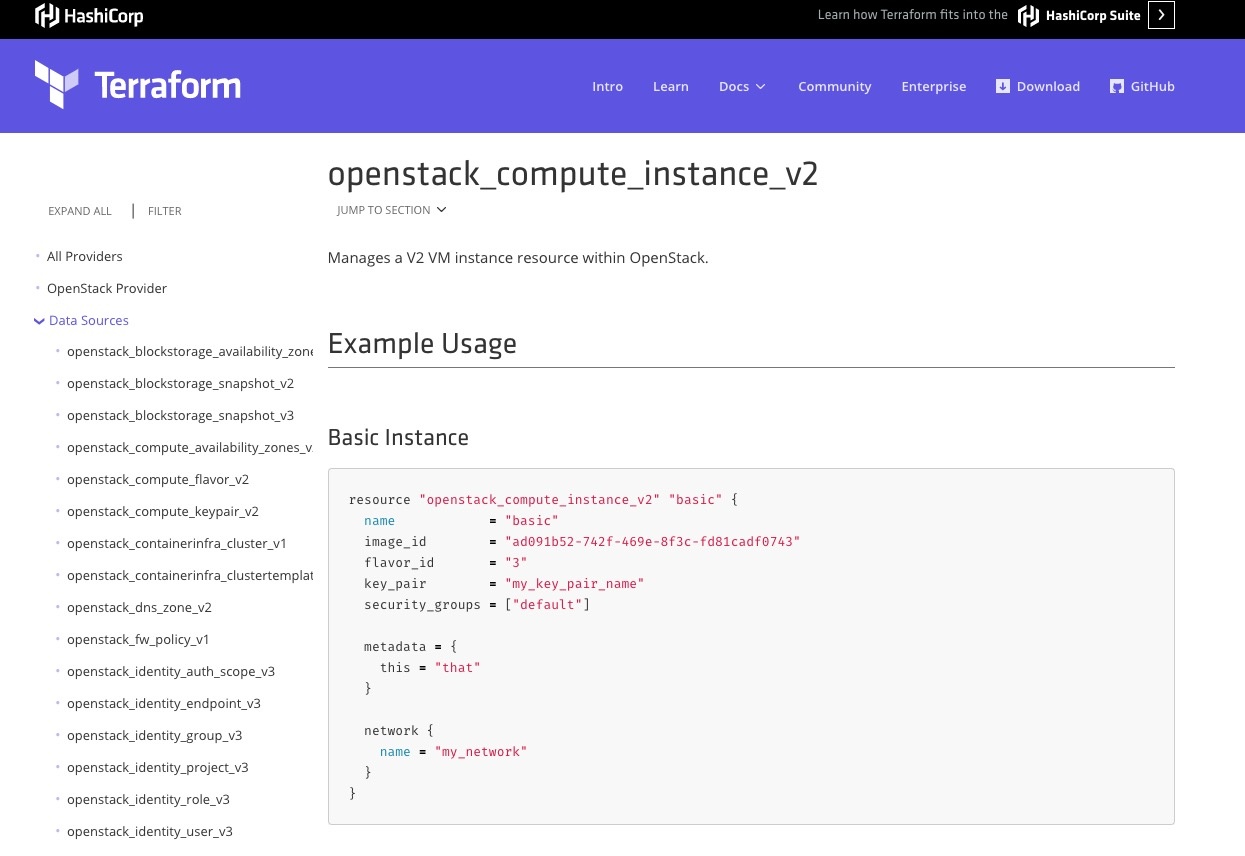
ConoHa VPSのベースは OpenStack なのでTerraform公式ページから参考にしましょう。
https://www.terraform.io/docs/providers/openstack/r/compute_keypair_v2.html
https://www.terraform.io/docs/providers/openstack/r/compute_instance_v2.html
- 構成
|
1 2 3 4 5 6 |
$ tree . └── env └── prd ├── server.tf └── variables.tf |
- server.tf
|
1 2 3 4 5 6 7 8 9 10 11 12 13 14 15 16 17 18 19 20 21 22 23 24 25 26 27 |
provider "openstack" { user_name = "${var.user_name}" password = "${var.password}" tenant_name = "${var.tenant_name}" auth_url = "${var.auth_url}" } resource "openstack_compute_keypair_v2" "keypair" { name = "terraform-conoha-vps" public_key = "${var.public_key}" } resource "openstack_compute_instance_v2" "terraform-server01" { name = "terraform-server01" image_name = "${var.image_name}" flavor_name = "${var.flavor_name}" key_pair = "terraform-conoha-vps" security_groups = [ "gncs-ipv4-ssh", "gncs-ipv4-web", ] metadata = { instance_name_tag = "terraform-server01" } } |
- variable.tf
|
1 2 3 4 5 6 7 8 9 10 11 12 13 14 15 16 17 18 19 20 21 22 23 24 25 26 27 |
variable "user_name" { default = "gncuxxxxx" } variable "password" { default = "xxxxx" } variable "tenant_name" { default = "gncuxxxxx" } variable "auth_url" { default = "https://identity.tyo1.conoha.io/v2.0" } variable "public_key" { default = "ssh-rsaxxxxxxxxxxxxxxxxxxxxx" } variable "image_name" { default = "vmi-ubuntu-18.04-amd64" } variable "flavor_name" { default = "g-1gb" } |
■terraform init
|
1 2 3 4 5 6 7 8 9 10 11 12 13 14 15 16 17 18 19 20 21 22 23 24 25 26 27 28 29 30 31 |
$ terraform init Initializing the backend... Initializing provider plugins... - Checking for available provider plugins... - Downloading plugin for provider "openstack" (terraform-providers/openstack) 1.20.0... The following providers do not have any version constraints in configuration, so the latest version was installed. To prevent automatic upgrades to new major versions that may contain breaking changes, it is recommended to add version = "..." constraints to the corresponding provider blocks in configuration, with the constraint strings suggested below. * provider.openstack: version = "~> 1.20" Terraform has been successfully initialized! You may now begin working with Terraform. Try running "terraform plan" to see any changes that are required for your infrastructure. All Terraform commands should now work. If you ever set or change modules or backend configuration for Terraform, rerun this command to reinitialize your working directory. If you forget, other commands will detect it and remind you to do so if necessary. $ terraform -v Terraform v0.12.4 + provider.openstack v1.20.0 |
■terraform plan
|
1 2 3 4 5 6 7 8 9 10 11 12 13 14 15 16 17 18 19 20 21 22 23 24 25 26 27 28 29 30 31 32 33 34 35 36 37 38 39 40 41 42 43 44 45 46 47 48 49 50 51 52 53 54 55 56 57 58 59 60 61 62 63 64 65 66 67 68 |
$ terraform plan Refreshing Terraform state in-memory prior to plan... The refreshed state will be used to calculate this plan, but will not be persisted to local or remote state storage. ------------------------------------------------------------------------ An execution plan has been generated and is shown below. Resource actions are indicated with the following symbols: + create Terraform will perform the following actions: # openstack_compute_instance_v2.terraform-server01 will be created + resource "openstack_compute_instance_v2" "terraform-server01" { + access_ip_v4 = (known after apply) + access_ip_v6 = (known after apply) + all_metadata = (known after apply) + availability_zone = (known after apply) + flavor_id = (known after apply) + flavor_name = "g-1gb" + force_delete = false + id = (known after apply) + image_id = (known after apply) + image_name = "vmi-ubuntu-18.04-amd64" + key_pair = "terraform-conoha-vps" + metadata = { + "instance_name_tag" = "terraform-server01" } + name = "terraform-server01" + power_state = "active" + region = (known after apply) + security_groups = [ + "gncs-ipv4-ssh", + "gncs-ipv4-web", ] + stop_before_destroy = false + network { + access_network = (known after apply) + fixed_ip_v4 = (known after apply) + fixed_ip_v6 = (known after apply) + floating_ip = (known after apply) + mac = (known after apply) + name = (known after apply) + port = (known after apply) + uuid = (known after apply) } } # openstack_compute_keypair_v2.keypair will be created + resource "openstack_compute_keypair_v2" "keypair" { + fingerprint = (known after apply) + id = (known after apply) + name = "terraform-conoha-vps" + private_key = (known after apply) + public_key = "ssh-rsa xxxxxxxxxxxxxxl" + region = (known after apply) } Plan: 2 to add, 0 to change, 0 to destroy. ------------------------------------------------------------------------ Note: You didn't specify an "-out" parameter to save this plan, so Terraform can't guarantee that exactly these actions will be performed if "terraform apply" is subsequently run. |
良さそう✌️
■terrafom apply
|
1 2 3 4 5 6 7 8 9 10 11 12 13 14 15 16 17 18 19 20 21 22 23 24 25 26 27 28 29 30 31 32 33 34 35 36 37 38 39 40 41 42 43 44 45 46 47 48 49 50 51 52 53 54 55 56 57 58 59 60 61 62 63 64 65 66 67 68 69 70 71 72 73 74 75 76 77 78 79 80 81 |
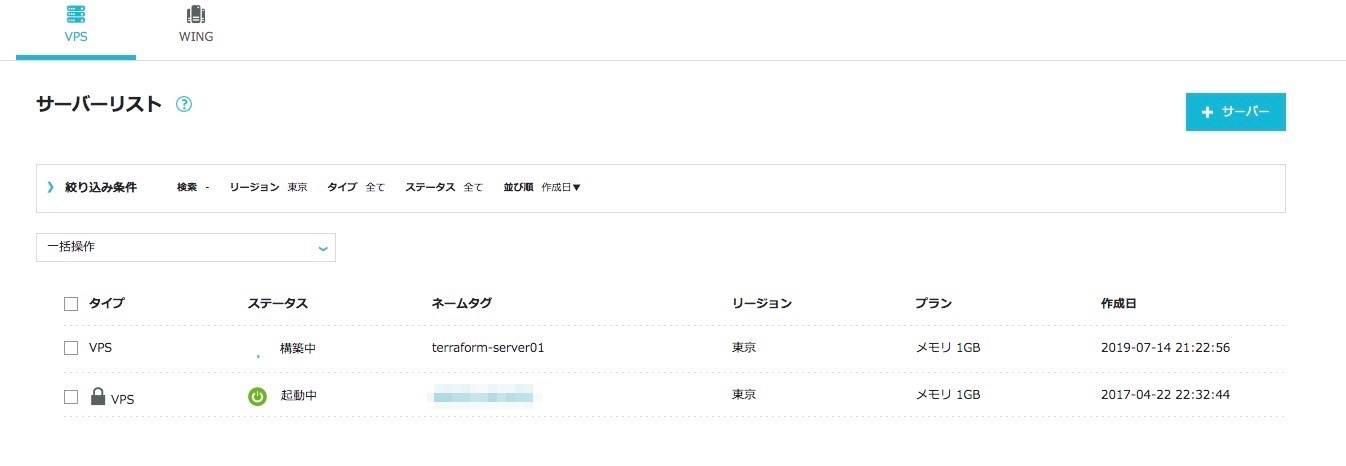
$ terraform apply An execution plan has been generated and is shown below. Resource actions are indicated with the following symbols: + create Terraform will perform the following actions: # openstack_compute_instance_v2.terraform-server01 will be created + resource "openstack_compute_instance_v2" "terraform-server01" { + access_ip_v4 = (known after apply) + access_ip_v6 = (known after apply) + all_metadata = (known after apply) + availability_zone = (known after apply) + flavor_id = (known after apply) + flavor_name = "g-1gb" + force_delete = false + id = (known after apply) + image_id = (known after apply) + image_name = "vmi-ubuntu-18.04-amd64" + key_pair = "terraform-conoha-vps" + metadata = { + "instance_name_tag" = "terraform-server01" } + name = "terraform-server01" + power_state = "active" + region = (known after apply) + security_groups = [ + "gncs-ipv4-ssh", + "gncs-ipv4-web", ] + stop_before_destroy = false + network { + access_network = (known after apply) + fixed_ip_v4 = (known after apply) + fixed_ip_v6 = (known after apply) + floating_ip = (known after apply) + mac = (known after apply) + name = (known after apply) + port = (known after apply) + uuid = (known after apply) } } # openstack_compute_keypair_v2.keypair will be created + resource "openstack_compute_keypair_v2" "keypair" { + fingerprint = (known after apply) + id = (known after apply) + name = "terraform-conoha-vps" + private_key = (known after apply) + public_key = "ssh-rsa xxxxxxxxxxxxxxxxxxxxxxxxx" + region = (known after apply) } Plan: 2 to add, 0 to change, 0 to destroy. Do you want to perform these actions? Terraform will perform the actions described above. Only 'yes' will be accepted to approve. Enter a value: yes openstack_compute_keypair_v2.keypair: Creating... openstack_compute_instance_v2.terraform-server01: Creating... openstack_compute_keypair_v2.keypair: Creation complete after 1s [id=terraform-conoha-vps] openstack_compute_instance_v2.terraform-server01: Still creating... [10s elapsed] openstack_compute_instance_v2.terraform-server01: Still creating... [20s elapsed] openstack_compute_instance_v2.terraform-server01: Creation complete after 23s [id=2176b8de-f68b-4381-974e-59644d880be7] Apply complete! Resources: 2 added, 0 changed, 0 destroyed. $ ls -la total 32 drwxr-xr-x 7 xxxxxxxxx staff 224 Jul 14 21:24 ./ drwxr-xr-x 6 xxxxxxxxx staff 192 Jul 14 20:38 ../ drwxr-xr-x 3 xxxxxxxxx staff 96 Jul 14 21:22 .terraform/ -rw-r--r-- 1 xxxxxxxxx staff 618 Jul 14 20:38 server.tf -rw-r--r-- 1 xxxxxxxxx staff 156 Jul 14 21:24 terraform.tfstate -rw-r--r-- 1 xxxxxxxxx staff 3546 Jul 14 21:24 terraform.tfstate.backup -rw-r--r-- 1 xxxxxxxxx staff 802 Jul 14 21:22 variables.tf |
できてる!!!
|
1 2 3 4 5 6 7 8 9 10 11 12 13 14 15 16 17 18 19 20 21 22 23 24 25 26 |
$ ssh -i adachin root@150.95.141.193 The authenticity of host '150.95.141.193 (150.95.141.193)' can't be established. ECDSA key fingerprint is SHA256:4tnjD/d0FNjAvUh8fD+kmUsV5e9wRCBsn0z3Vyg+02s. Are you sure you want to continue connecting (yes/no)? yes Warning: Permanently added '150.95.141.193' (ECDSA) to the list of known hosts. Welcome to Ubuntu 18.04.2 LTS (GNU/Linux 4.15.0-50-generic x86_64) * Documentation: https://help.ubuntu.com * Management: https://landscape.canonical.com * Support: https://ubuntu.com/advantage System information as of Sun Jul 14 21:24:09 JST 2019 System load: 0.64 Processes: 107 Usage of /: 9.1% of 49.09GB Users logged in: 0 Memory usage: 20% IP address for eth0: 150.95.141.193 Swap usage: 0% 99 packages can be updated. 53 updates are security updates. root@150-95-141-193:~# exit logout Connection to 150.95.141.193 closed. |
SSHも問題なくできたので、恐怖の destroy もしてみましょう。
■terrafom destroy
|
1 2 3 4 5 6 7 8 9 10 11 12 13 14 15 16 17 18 19 20 21 22 23 24 25 26 27 28 29 30 31 32 33 34 35 36 37 38 39 40 41 42 43 44 45 46 47 48 49 50 51 52 53 54 55 56 57 58 59 60 61 62 63 64 65 66 67 68 69 70 71 72 73 74 75 76 77 78 79 80 81 |
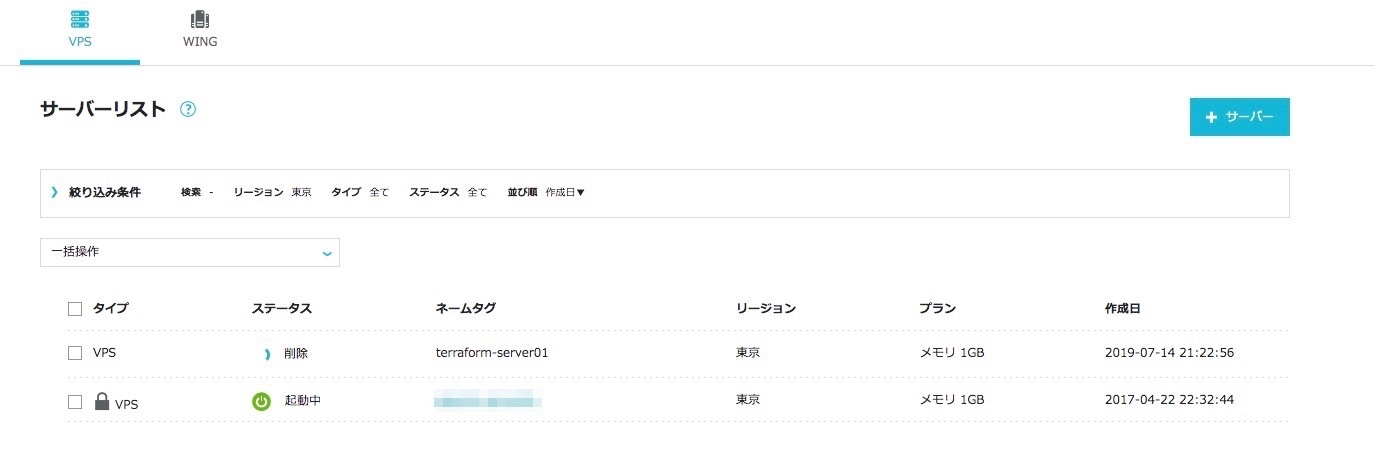
$ terraform destroy openstack_compute_keypair_v2.keypair: Refreshing state... [id=terraform-conoha-vps] openstack_compute_instance_v2.terraform-server01: Refreshing state... [id=2176b8de-f68b-4381-974e-59644d880be7] An execution plan has been generated and is shown below. Resource actions are indicated with the following symbols: - destroy Terraform will perform the following actions: # openstack_compute_instance_v2.terraform-server01 will be destroyed - resource "openstack_compute_instance_v2" "terraform-server01" { - access_ip_v4 = "150.95.141.193" -> null - access_ip_v6 = "[2400:8500:1302:822:150:95:141:193]" -> null - all_metadata = { - "backup_id" = "" - "backup_set" = "0" - "backup_status" = "active" - "instance_name_tag" = "terraform-server01" - "properties" = jsonencode( { - cdrom_path = "" - hw_disk_bus = "virtio" - hw_video_model = "vga" - hw_vif_model = "virtio" - vnc_keymap = "ja" } ) } -> null - availability_zone = "nova" -> null - flavor_id = "7eea7469-0d85-4f82-8050-6ae742394681" -> null - flavor_name = "g-1gb" -> null - force_delete = false -> null - id = "2176b8de-f68b-4381-974e-59644d880be7" -> null - image_id = "6392c95b-9c59-4d7d-bc90-30247065fa46" -> null - image_name = "vmi-ubuntu-18.04-amd64" -> null - key_pair = "terraform-conoha-vps" -> null - metadata = { - "instance_name_tag" = "terraform-server01" } -> null - name = "150-95-141-193" -> null - power_state = "active" -> null - security_groups = [ - "gncs-ipv4-ssh", - "gncs-ipv4-web", ] -> null - stop_before_destroy = false -> null - network { - access_network = false -> null - fixed_ip_v4 = "150.95.141.193" -> null - fixed_ip_v6 = "[2400:8500:1302:822:150:95:141:193]" -> null - mac = "02:01:96:5f:8d:c1" -> null - name = "ext-150-95-140-0-23" -> null - uuid = "0d2b3596-4320-4e57-9e31-5e6ed134a7fe" -> null } } # openstack_compute_keypair_v2.keypair will be destroyed - resource "openstack_compute_keypair_v2" "keypair" { - fingerprint = "b5:86:72:2f:42:ce:9e:3f:ff:ca:97:32:5f:ed:45:11" -> null - id = "terraform-conoha-vps" -> null - name = "terraform-conoha-vps" -> null - public_key = "ssh-rsa xxxxxxxxxxxxxxxl" -> null } Plan: 0 to add, 0 to change, 2 to destroy. Do you really want to destroy all resources? Terraform will destroy all your managed infrastructure, as shown above. There is no undo. Only 'yes' will be accepted to confirm. Enter a value: yes openstack_compute_keypair_v2.keypair: Destroying... [id=terraform-conoha-vps] openstack_compute_instance_v2.terraform-server01: Destroying... [id=2176b8de-f68b-4381-974e-59644d880be7] openstack_compute_keypair_v2.keypair: Destruction complete after 0s openstack_compute_instance_v2.terraform-server01: Still destroying... [id=2176b8de-f68b-4381-974e-59644d880be7, 10s elapsed] openstack_compute_instance_v2.terraform-server01: Destruction complete after 12s Destroy complete! Resources: 2 destroyed. |
■まとめ
おっしゃああ!これで今動いているのも terraform import しちゃおう!OpenStackでのTerraformは初だったので新鮮。

0件のコメント