前回はChef-ServerをVagrantで構築してみましたが、今回は試行錯誤した結果!1から自分なりに構築しました。
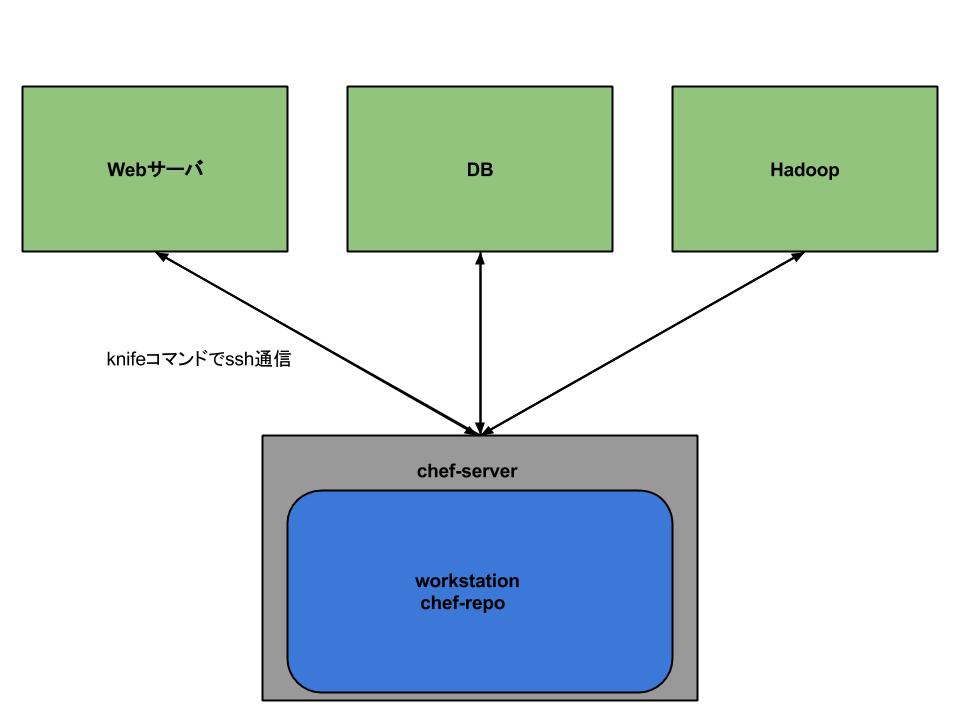
■構成図
■Chef-Serverでのネットワーク確認方法
ここらへんがちゃんと設定しないとChef-Serverがうまく動かないので確認しましょう!!
|
1 2 3 4 |
$ cat /etc/sysconfig/network NETWORKING=yes HOSTNAME=chef.adachin.jp GATEWAY=hoge.hoge.hoge.hoge |
|
1 2 3 |
$ cat /etc/resolv.conf search 作ったDNSサーバのドメイン nameserver hoge.hoge.hoge.hoge |
|
1 2 3 4 5 6 7 8 |
$ cat /etc/sysconfig/network-scripts/ifcfg-eth0 ネットワークの設定はデフォルトだといらないものもあるので省きました DEVICE=eth0 BOOTPROTO=static HWADDR=hoge.hoge.hoge.hoge IPADDR=hoge.hoge.hoge.hoge NETMASK=255.255.0.0 ONBOOT=yes |
設定後は必ずサーバ再起動しましょう。
■Chef-Serverインストール
Chef-Server12はnode数が決まっているみたいなので、11系を今回は使用します。
|
1 |
$ wget https://web-dl.packagecloud.io/chef/stable/packages/el/6/chef-server-11.1.6-1.el6.x86_64.rpm |
|
1 |
$ rpm -ivh chef-server-11.1.6-1.el6.x86_64.rpm |
■openssl-develインストール
|
1 |
$ sudo yum -y install openssl-devel |
■Rubyインストール
|
1 |
https://github.com/sstephenson/rbenv.git ~/.rbenv |
|
1 2 3 4 5 |
# PATH に追加 $ echo 'export PATH="$HOME/.rbenv/bin:$PATH"' ~/.bash_profile # .bash_profile に追加 $ echo 'eval "$(rbenv init -)"' ~/.bash_profile # 上記設定の再読み込み $ exec $SHELL -l |
|
1 2 3 |
#rbenvの確認 $ rbenv --version rbenv 0.4.0-74-g95a039a |
|
1 2 |
#ruby-buildをclone $ git clone https://github.com/sstephenson/ruby-build.git ~/.rbenv/plugins/ruby-build |
|
1 2 |
#ruby最新版を確認 $ rbenv install --list |
|
1 2 |
#rubyのインストール $ rbenv install -v 2.1.2 |
|
1 2 |
#再読み込み $ rbenv rehash |
|
1 2 3 |
#確認 $ rbenv versions * system (set by /home/adcadmin/.rbenv/version) 2.1.2 |
|
1 2 |
#2.1.2に読み込ませる $ rbenv global 2.1.2 |
|
1 2 |
#RubyGemを追加 $ gem install padrino |
|
1 2 |
$ ruby -v ruby 2.1.2p95 (2014-05-08 revision 45877) [x86_64-linux] |
■readlineインストール
|
1 |
$ sudo yum -y install readline-devel |
■chef-server実行/test
|
1 |
$ chef-server-ctl reconfigure |
|
1 |
$ chef-server-ctl test #opscodeがでたらOK |
■chef-clientインストール
|
1 |
$ sudo yum install git |
|
1 |
$ curl -L http://www.opscode.com/chef/install.sh | sudo bash -s - -v 11.14.6 |
|
1 2 |
$ sudo chef-client -v Chef: 11.14.6 |
■.chefディレクトリ作成/鍵の配置
|
1 |
$ mkdir ~/.chef |
|
1 |
$ cd /etc/chef-server/ |
|
1 2 |
$ sudo cp -r /etc/chef-server/admin.pem chef-validator.pem ~/.chef この鍵2つはGitなどにあげときましょう |
■knife configure -iの設定
workstationの作成をします。
|
1 2 3 4 5 6 7 8 9 10 11 12 |
$ knife configure --initial WARNING: No knife configuration file found Where should I put the config file? [/home/user/.chef/knife.rb] Please enter the chef server URL: [http://(自ホストのFQDN):4000] https://(Chef ServerのFQDN) Please enter a name for the new user: [root] root Please enter the existing admin name: [admin] Please enter the location of the existing admin's private key: [/etc/chef/admin.pem] /home/user/.chef/admin.pem Please enter the validation clientname: [chef-validator] Please enter the location of the validation key: [/etc/chef/validation.pem] /home/user/.chef/chef-validator.pem Please enter the path to a chef repository (or leave blank): /home/user/chef-repo Creating initial API user... Please enter a password for the new user:任意のパスワードを入力 Created user[user] Configuration file written to /home/user/.chef/knife.rb |
|
1 |
$ knife client list #確認 |
・https://(Chef ServerのFQDN) でログインできるか確認しましょう。
よくエラーが出る場合 knife ssl fetch を打てば大丈夫です!これでChef-Serverの構築は以上です。あとはレシピを作りましょう。
■注意するところ
・nodeからChef-Serverにpingが打てるのか
・Chef-Serverからnodeにsshがつながるか
・ネットワークはちゃんと設定されてるか
■終わりに
ネットワーク周りは気をつけたいですね。。。次回は運用方法とnode追加についてブログします。


0件のコメント